Yoga Destiny
Tel: 732-637-YOGA - E-mail: YogaDestiny@gmail.com
  • Home
  • Services
  • Prices
  • Prenatal Yoga
  • Mommy & Me Yoga
  • Yoga Parties
  • Kid Birthday
  • Shop
  • Appointments
  • Contact Us
  • About Us
  • Blog
  • Testimonials
  • Special Events

Using a Yoga Strap, and Why Would I Want To…

1/27/2016

1 Comment

 
Yoga straps can be used to further develop your yoga practice whether you are a beginner or advanced practitioner.

You will find that with the use of a yoga strap that your range of motion increases allowing you to ease into more advanced poses while still maintain correct alignment. A yoga strap also provides support and stability in a pose, thereby preventing injury.

Many students also find that using a yoga strap helps them reach a specific yoga posture with less effort and in a faster time frame.

Overall, if you are stiff, recovering from an injury, or just want to maintain structural body alignment, a yoga strap is an inexpensive prop that adds great value to your practice.

Types of Yoga Straps

The main difference between yoga straps tends to be the length, material, and buckle.  Typically, yoga straps are available in lengths of 6 feet, 8 feet, and 10 feet in a durable cotton with either a plastic or metal buckle.
When selecting a yoga strap, keep in mind that the longer it is, the more slack there will be in the strap. Even if you are shorter in height, it doesn’t always mean that you want to go with the shorter strap. For instance, if you plan on using the strap for aligning the shoulders and back, take in to account that you will need to be able to comfortably wrap the strap around your midline, over your shoulders, and cross it around your back. Of course, you can always tie two straps together to create additional length, if necessary.
 
Poses to Try with Your Yoga Strap

After warming up with a few sun salutations, pick up your yoga strap and give these postures a go:

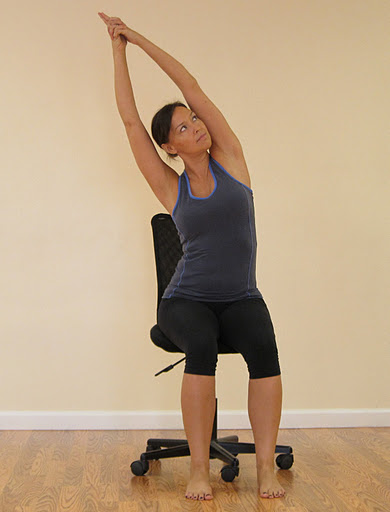
Seated Lateral Flexion: Sit in Sukhasana or any comfortable cross-legged position. Hold the strap with both hands raised overhead, shoulder-width apart with little to no slack in the strap. Keeping a firm grip on the strap, tilt the side of your torso to the right. Take a few slow breaths, then slowly tilt to your left for another few slow breaths.

Bound Angle (Baddha Konasana) with Jet Pack: While you are still seated on the floor, center the yoga strap horizontally, just under the shoulder blades, then take both ends of the strap under the arms and sling the ends up and over the top of the shoulders. Cross the strap at the back so it forms an “X,” then bring both strap ends back around the torso and buckle in the front. Press the soles of the feet together so the knees turn out to the sides and hinge forward from the hips. The strap will improve your posture and ensure that you keep your chest open.

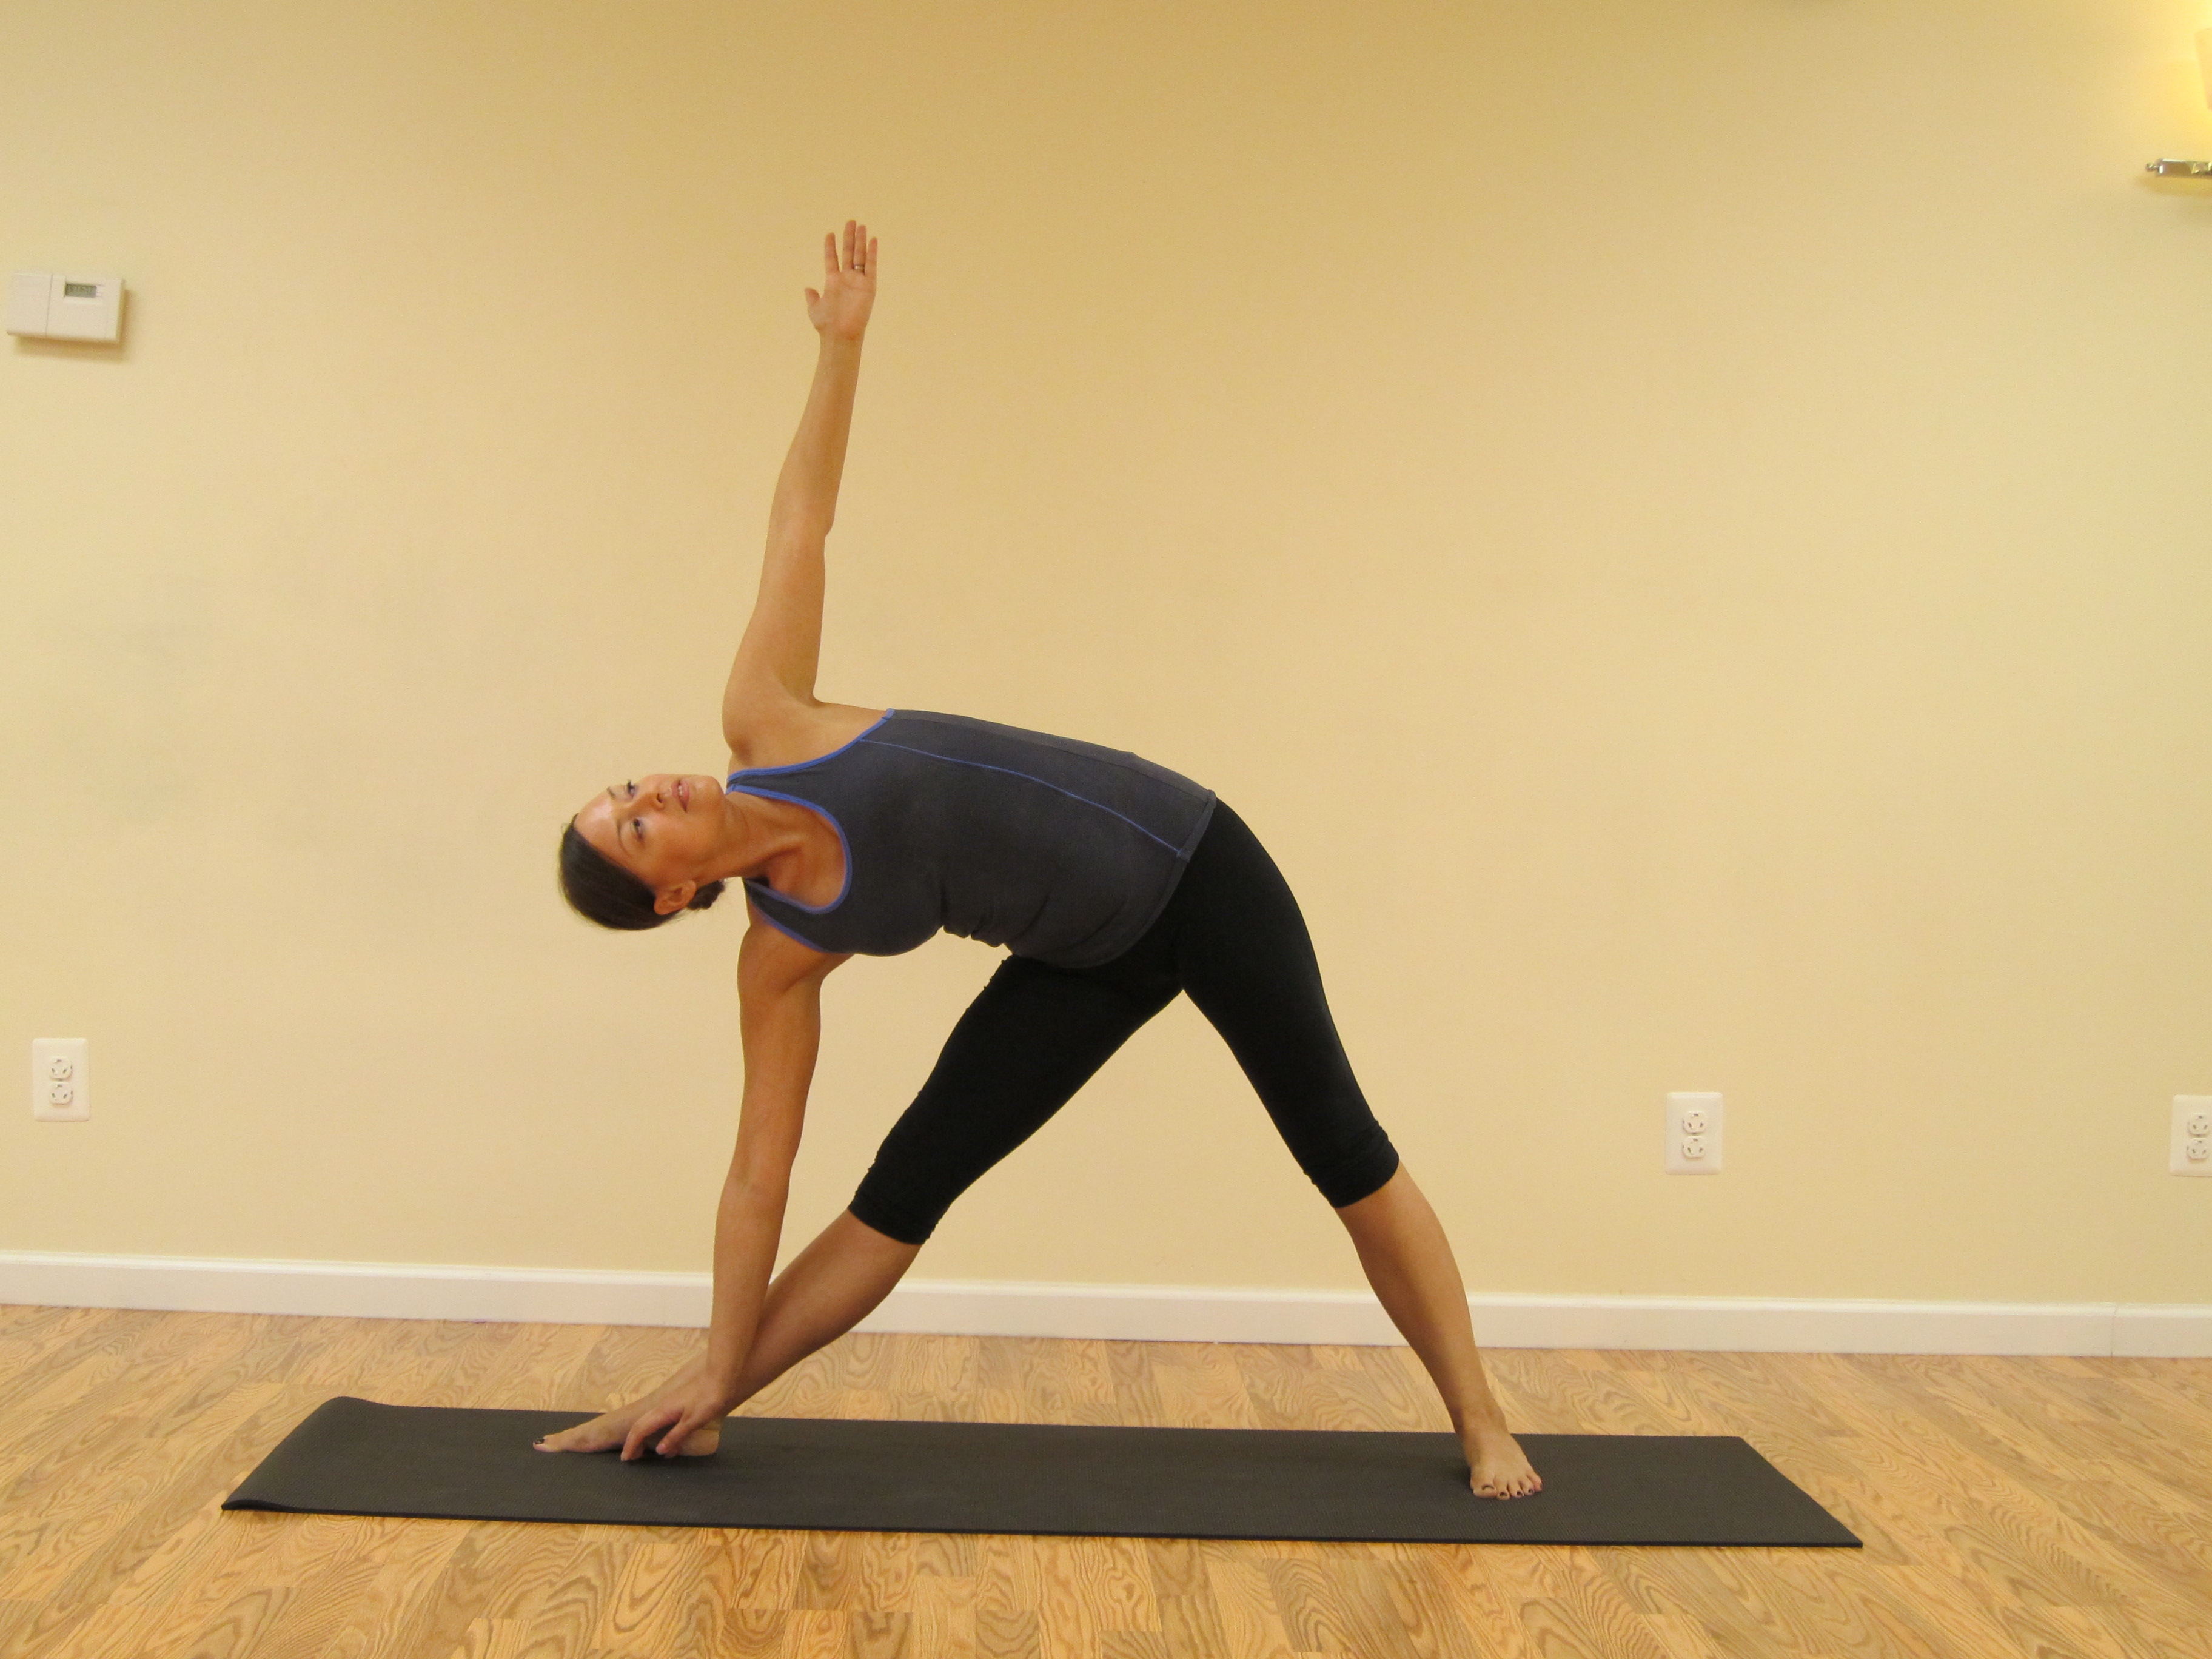
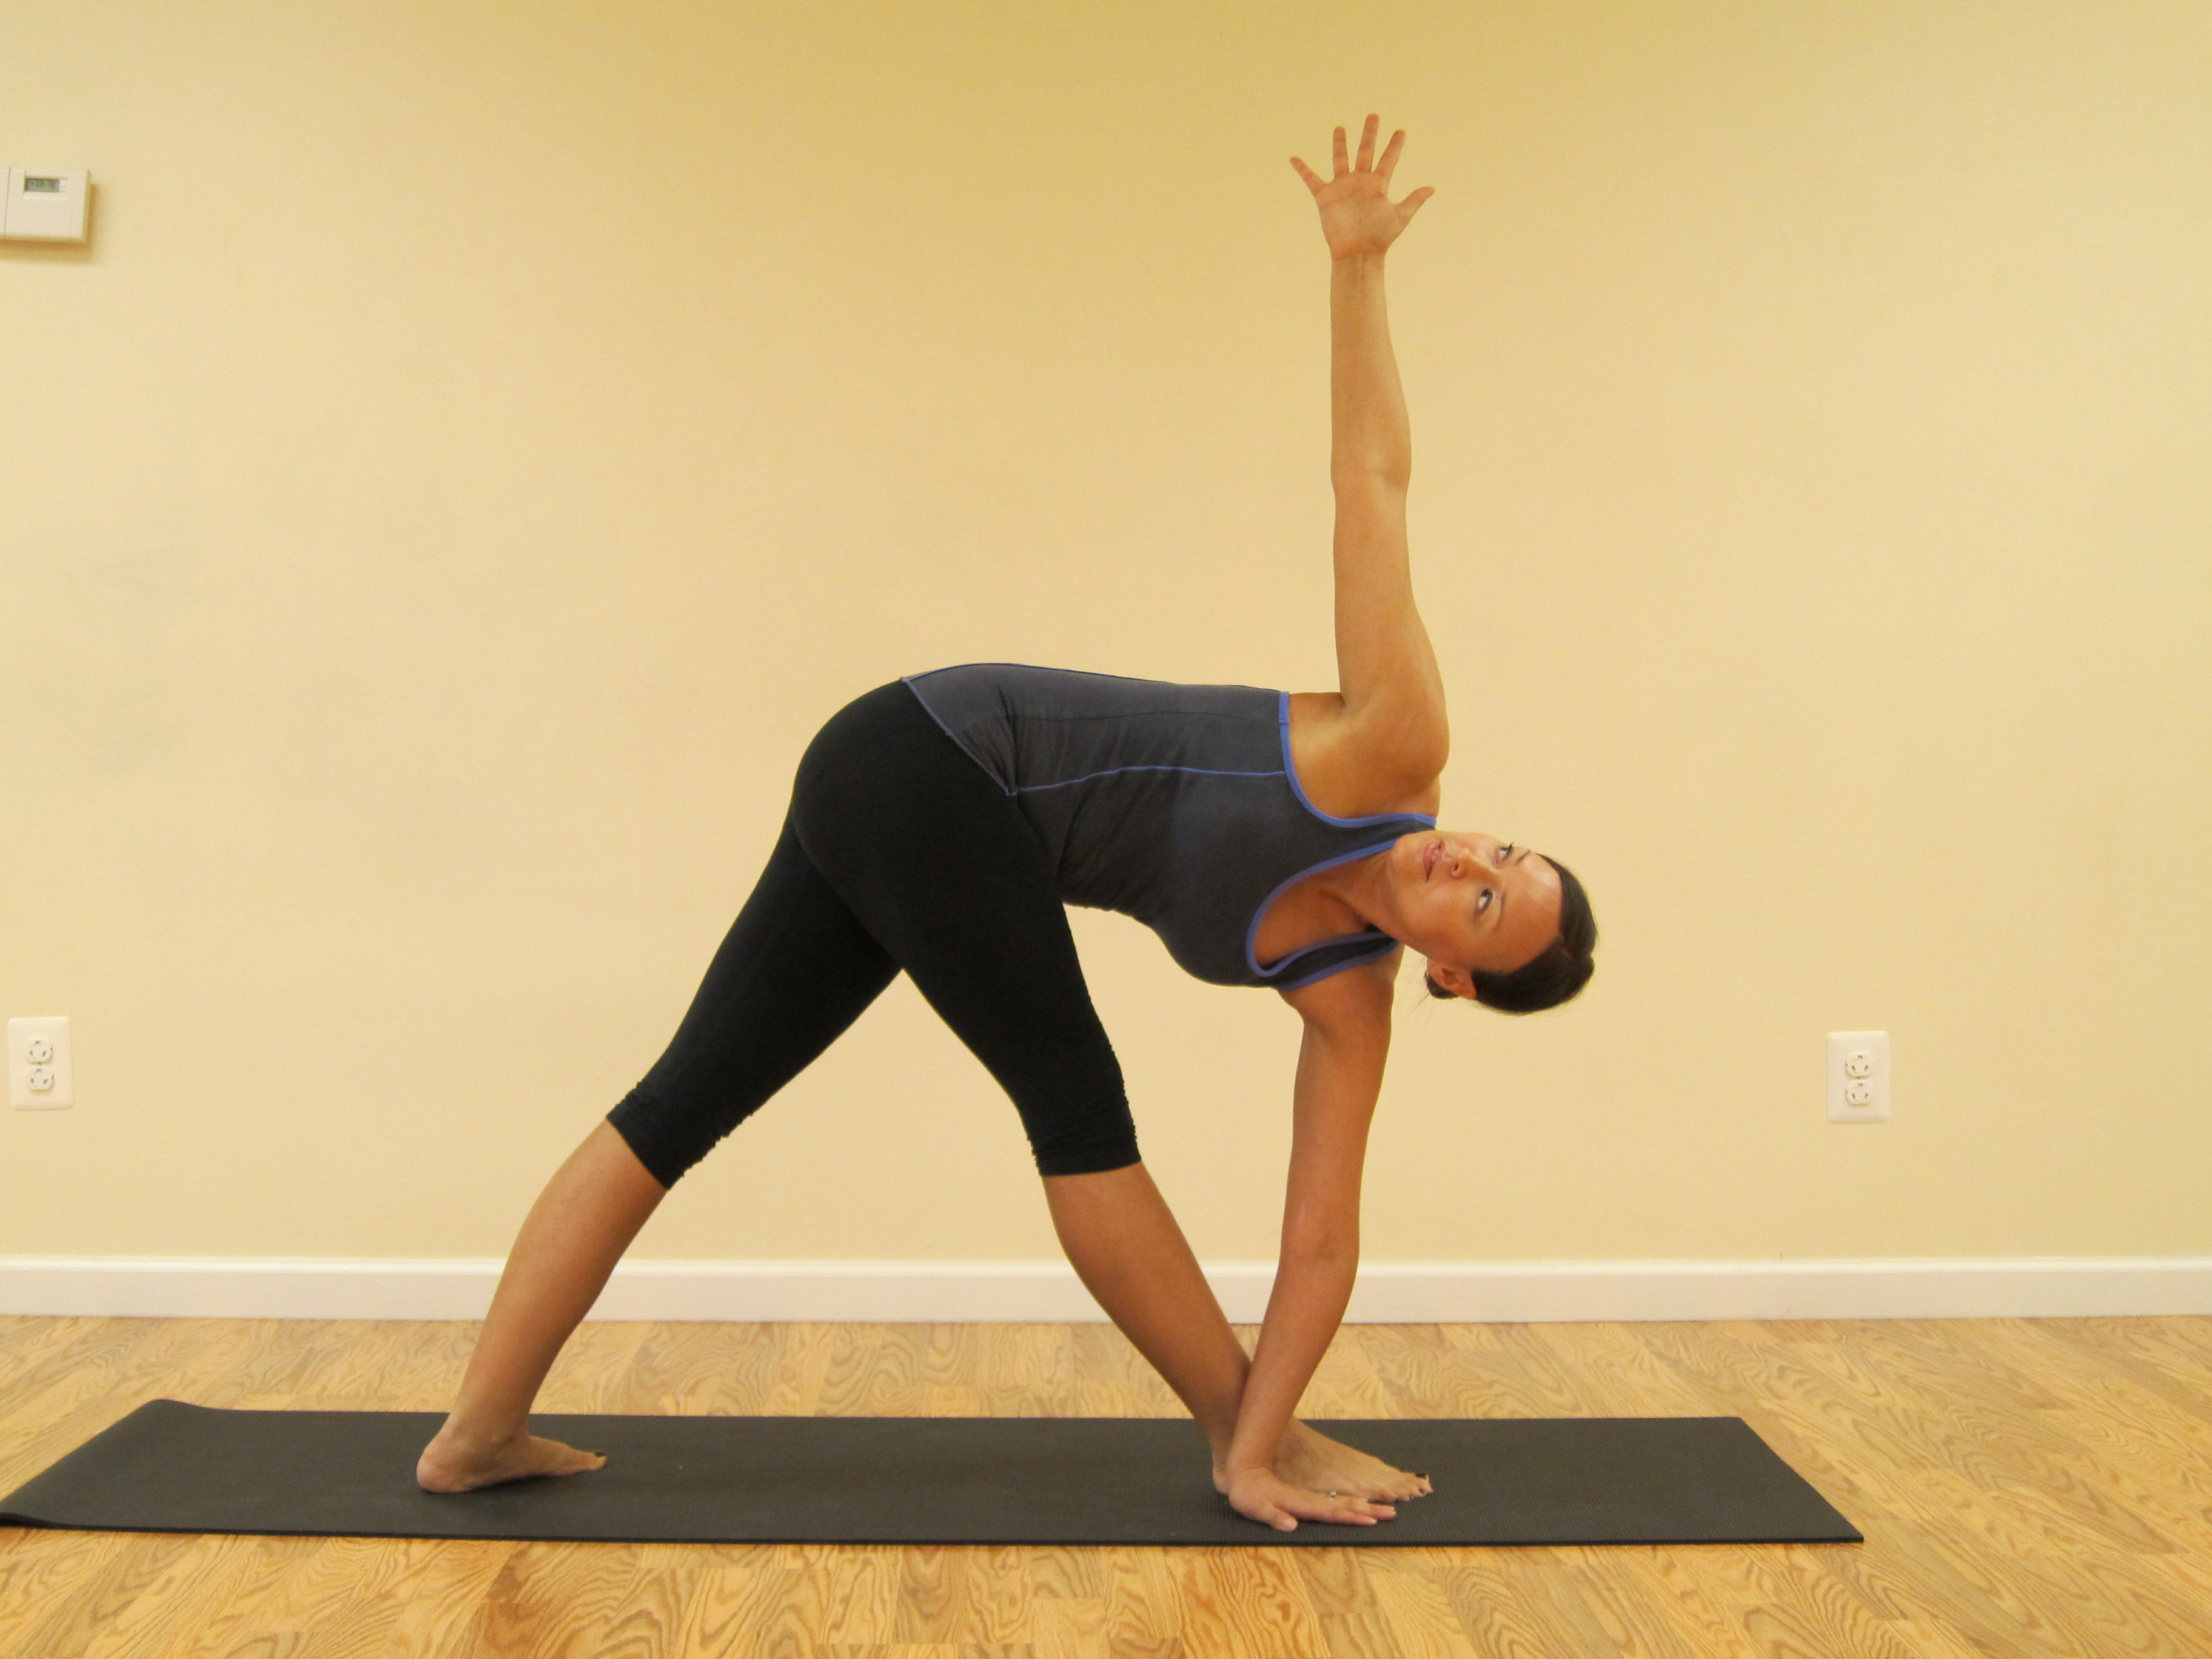
Triangle Pose (Trikonasana): Keep the strap in the same position crossed behind the back as instructed above, then stand up and separate your feet about 3 feet apart. Turn the right foot out to a 90 degree angle and the back left foot in to a 45 degree angle. With both arms extended out to the sides, push the left hip back towards the left ankle and bring the right side of your torso in line with the right knee. The strap will help keep shoulders opening so that the side of the body is in one plane. Repeat on the other side.

Extended Hand to Big Toe Hold (Utthita Hasta Padangustasana): Buckle the strap around the sole of your right foot, centering the strap at the arch of the foot. Hold on to the strap with the right hand. Then, lift your right leg up as high as you can while keeping the raised leg straight. The strap acts as an extension of the arms, if you aren’t able to hold on to the big toe of with the leg extended straight out in front of you. Even if you are able to easily hold on to the big toe, you may want to experiment with using the strap so that it is possible to gently lift the leg higher into the air. Repeat on the other side.

Reclining Bound Angle (Supta Baddha Konasana): From a seated position on the floor, press the soles of the feet together so the knees turn out to opposite sides. Center the strap behind your lower back and hold on to the ends of the strap with each hand. Guide the ends of the strap over the tops of the legs. Thread it over the ankles at first, then slide it underneath the ankles and buckle it so that the buckle is slightly above the side of the lower leg for comfort (anywhere so you don’t feel discomfort from the buckle pressing into the legs is fine). Now, slowly lie back on to the mat. The strap will bind your legs in place so that the feet won’t slip down the mat. The strap keeps the tension in the legs while giving you a feeling of support.

Reclining Hand to Big Toe Hold (Supta Padangustasana): Lying on the mat in a supine position, bring your right knee into your chest. Buckle the strap around the center of your right sole in a tight yet comfortable loop. Then, extend your right leg straight up so that the sole of the right foot is facing the ceiling. Left leg is straight (modification: bend the left knee). Here, the strap acts as an extension of the arms, if you are unable to hold on to the big toe with just the index and middle finger while keeping the leg straight. Even if you do have the range of motion to hold on to the big toe with a straight leg, you may want to use the strap to gently ease the leg closer to your head. Now, take the free end of the strap underneath the shoulder blades and pull it straight out to the left side. Keeping the left arm extended, use the strap as a pulley system to guide the right leg closer to the torso. Repeat with the left leg.

Cow Face Pose (Gomukhasana): Start in a seated position on the mat with your legs extended out in front. Bend the right knee into the body, then place the right foot on the outside of the left thigh on the floor. Bend the left knee and place the right knee on top of the left knee. Keep both sit bones grounded on the floor. With the strap in your left hand, raise your left arm overhead and bend the left elbow. Take the right arm behind the back and catch strap with the right hand. Begin to inch the hands along the strap until it is possible to claps both hands. In this case, the strap can really help you make progress if your shoulders are tight.  Repeat on the other side. For a modification to Cow Face Pose (Gomukhasana): sit in Easy Cross-legged Posed (Sukhasana)

King Dancer (Natarajasana): From a standing position, hold the strap in both hands and step the right foot on top of the strap on the floor. Cross the strap in front of you. Step the left foot through the loop like your would with a jump rope. Bend the right knee and pull on the strap with both hands to lift the back right leg toward the head. Repeat on the other side. Since this posture involves balancing, you might want to stand so that the side of the body is near a wall.

There are a lot of other yoga poses that you can employ the yoga strap with, but the ones listed above are a great introduction. Remember, yoga straps aren’t just used for easing into poses – they can also offer a more challenging tension. If you have reached a plateau in your practice or just don’t feel challenged, try adding a yoga strap to the mix and enjoy the new experience.


Follow us on Facebook and Twitter. For yoga in Dunellen, NJ or yoga in Piscataway, NJ and yoga in other Central New Jersey areas, get in touch with me at Yoga Destiny. 
1 Comment

Eye Pillows and Yoga

3/18/2015

0 Comments

 
PictureEye pillow
You might be wondering what an eye pillow is and, why you would want to use one, anyway. An eye pillow is a small rectangular pouch made of fabric filled with herbs. The covering of the pouch is typically made out of either satin or cotton fabric, although you can find eye pillows with a fleece covering, too. The pouch is usually filled with flax seed. Buckwheat can also be used as stuffing. Sometimes, lavender buds are added to the pouch for aromatherapy.

When the eye pillow is placed on the eyes, not only does it blocks out the light and rest tired eyes, the gentle weight of the pillow stimulates acupressure points around the eye to provide rejuvenation. The fabric covering of the eye pillow can offer cooling relief or soothing warmth. Obviously, a pillow covered in fleece would provide warmth, but satin and cotton fabric coverings can be used for warm or cold therapy.

While eye pillows can easily be used at room temperature to relieve fatigue and stress, many types of eye pillows can also be heated in microwaves for a few seconds to provide warmth or placed in the freezer for a short time to give cool comfort for migraines or puffy eyes.

Eye pillows are frequently used in yoga during savasana (corpse pose). Many people find that the eye pillow helps them to relax and slow the breath preparing them to inwardly turn their focus and move deeper into a meditative state. The pillows can also be employed to ease headaches or sinus pressure.

As the name implies, eye pillows are generally placed over the eyes, however, they can be used on different parts of the body to provide a comforting warmth or palliative coolness. A unique use for an eye pillow that I came across while researching this topic is for a support under the wrist to be used as a “mouse pillow” when working on the computer.

Eye pillows are conveniently sized for travel so that you can easily take them wherever you go to de-stress, rest your eyes, and assist with a deep and restorative sleep.

If you would like to invest in an eye pillow for your health and comfort, go to YogaDestiny.com and purchase one today. Our scented, tranquility eye pillow is made with a silky satin covering. Each 4" x 8.5" eye pillow is filled with luxurious french lavender and organic flax seed. All eye pillows are made in the USA.

Additional Resources:  Quality handmade eye pillows


Follow us on Facebook and Twitter. For yoga in Dunellen, NJ or yoga in Piscataway, NJ and yoga in other Central New Jersey areas, get in touch with me at Yoga Destiny.


0 Comments

Legs Up the Wall (Viparita Karani)

8/25/2014

2 Comments

 
PictureLegs Up the Wall (Viparita Karani)
Legs Up the Wall or Viparita Karani  is one of the most celebrated yoga poses because of the posture’s long list of benefits. It is recommended for those with both low and high blood pressure. As a gentle inversion, Legs Up the Wall pose reverses the blood flow towards the upper body and head for improved circulation.

There are countless benefits touted with practicing Legs Up the Wall pose such as improved digestion and thyroid function, relief for lower back tension, migraines, insomnia, varicose veins, menstrual cramps, anxiety, edema and more. However, avoid this pose if you have glaucoma or serious neck and back issues.

Getting into the Pose:

Start by sitting on the floor with the right hip flush against the wall. Raise the right leg up the wall allowing the left leg to follow as you lie down with your back on the floor. Bring the sit bones as close to the wall as possible so the body is at a 90° angle against the wall with the back on the floor and the legs straight up the wall. Close the eyes and allow the arms to rest on the ground parted a few inches away from the sides of the torso. Turn the palms up towards the ceiling. Relax in this posture for up to 5 minutes. Beginners may want to stay in the pose for a shorter time.

Modifications:

Keep in mind that Legs Up the Wall is a restorative pose. Therefore, you want to be able to relax in this posture. If you find it uncomfortable to rest with your legs up the wall, try these modifications:

1) Move the hips further away from the wall instead of having the body at a 90° angle.

2) Place a bolster (a firm supportive cushion) under the hips. If you don’t have a bolster, you can substitute a rolled up yoga mat or several blankets as a prop.

3) Use a folded blanket to elevate the head, if it doesn’t comfortably rest on the floor. Try positioning the folded blanket just under the back of the shoulders to provide additional support for the head and neck.

Coming Out of the Pose, Safely:

Place the soles of the feet on the wall. Lower the bent knees toward the chest. Then, with the knees still bent, roll on to the left side. Rest in this fetal position for a few breaths before slowly pressing back up in to a seated position on the floor.

For Deeper Relaxation:

Place an eye pillow on the eyes and/or one on each hand. Just observe the breath moving through the body. There’s no need to alter the breath, just simply be a witness to the chest and abdomen inflating and deflating with each inhalation and exhalation.

For your convenience, Yoga Destiny offers lavender-scented eye pillows. Each eye pillow is covered in a silky satin and filled with luxurious French lavender and organic flax seed. Eye pillows are made in the USA. Eye pillow dimensions:  4" x 8.5".

Follow us on Facebook and Twitter. For yoga in Dunellen, NJ or yoga in Piscataway, NJ and yoga in other Central New Jersey areas, get in touch with me at Yoga Destiny.
2 Comments

Yoga Birthday Parties for Kids

8/20/2014

0 Comments

 
Picture
Looking for a new birthday party theme that your kids will love? A yoga birthday party can make your child’s day extra special. 

Kids can enjoy healthy activities in the form of yoga games, music, and relaxation. Fun and creative activities designed to inspire children’s imaginations such as musical yoga chairs, a freeze yoga dance, or mandala creation are just a few of the yoga games that kids can play.

Have children make a “yoga” birthday cake by using their body to form candles. Then, let the birthday boy or girl blow out the candles as the guests sing “Happy Birthday”. By using certified yoga instructors trained in teaching children’s yoga, you can be assured that your child and her/his party guests will be shown techniques to safely learn yoga.

Yoga birthday parties don’t have to just be for your young children. Pre-teens and teenagers can also enjoy fun yoga parties as part of their birthday celebration. Yoga instructors can customize the yoga poses and activities to an age appropriate level.

Party fees with certified yoga instructors generally range from $300-$450 depending on package inclusions and location. Extra goodies such as yummy treats in yoga shapes, lavender-scented eye pillows, yoga mats to take home, and other party favors can be added on to make the event even more memorable. 

You will find that many yoga teachers are willing to travel to your home to conduct the yoga birthday party, if you don’t want to have the event in the yoga studio.


Yoga Destiny offers children’s yoga birthday parties in central New Jersey. For more information, contact Yoga Destiny at 732-637-YOGA or YogaDestiny@gmail.com.

Follow us on Facebook and Twitter. For yoga in Dunellen, NJ or yoga in Piscataway, NJ and yoga in other Central New Jersey areas, get in touch with me at Yoga Destiny.

0 Comments

Find Relief with this Quick Pre-natal Yoga Routine

6/11/2014

0 Comments

 
Picture
Pregnancy is an exciting moment in life, but along with this beautiful experience you may feel a few aches like back pain and fatigue. Pre-natal yoga is a wonderful way to bring ease to these common discomforts.

Start by sitting cross-legged on the floor. Bring the focus inward and connect with your breath. Place one hand on the belly and one hand on the chest to witness the rhythm of your breath. Notice how the belly inflates and the chest rises with each inhalation. Feel how the belly deflates and the chest falls as you exhale.

Move on to cat/cows to warm up the spine and release lower back tension. Begin by getting on all fours. Then alternately arch and round the back. Repeat at least 5 times. Next, stay on all fours and stretch the right leg back while flexing the foot for a spinal balance. If you feel steady, reach the left arm forward. Repeat on the opposite side. This pose stretches the back of the legs and can relieve fatigue.

Another great pose to alleviate lower back pain is a right angle pose to the wall. Perform this posture by pressing the palms against a wall with straight arms and back parallel to the floor. Feet should be hip width apart and heels directly under the hips.

Try a triangle pose to ease backache, strengthen legs, and stretch the outer hip and inner thigh muscles.  Step feet apart about 3 ½ feet. Turn the right foot out 90 degrees and the left foot in to a 45 degree angle. Extend the right arm down to the floor. Reach the left arm in to the air, keeping the left-hand directly over the shoulder with palm facing the front. Gaze up to the raised left thumb. Repeat pose on left side.

A warrior II pose is a way to open the groins and strengthen the legs in preparation for birth. Stand with feet approximately 3 ½ to 4 feet apart from each other. Turn the right foot out to a 90 degree angle so that toes face the short end of the mat. Turn left foot in to a 45 degree angle.  Extend arms out to the sides until hands are at shoulder height. Palms are turned down to the ground. Gaze out over right hand.  Repeat pose on left side.

The tree pose improves balance and strengthens the legs. From a standing position, pick up the right foot and place toes on the floor. Turn the right knee out to the right side. Keep gaze focused on a single point. Repeat pose on left side. If you are steady in this pose, try placing the raised foot on either the side of the calf or inner thigh. Avoid placing the foot on the side of the knee.

A very practical pose to practice during pregnancy is garland pose as it aids in childbirth. The pose strengthens the pelvic floor and abdominal muscles while providing a deep stretch to inner thighs and lower back muscles.

Increase hip flexibility and stretch inner thigh muscles with bound angle pose. Sit on the floor with soles of the feet pressed together and knees jutting out to either side. Stay in the pose for several breaths.

Conclude the practice with savasana to relax the body and calm the mind. Lie on your left-side with a blanket or pillow under the head and another blanket in between the legs to keep the spine straight. Close the eyes and allow your body and mind to rest for a few minutes. 

Additional Resources: Shiva Rea's Prenatal Yoga

Follow us on Facebook and Twitter. For yoga in Dunellen, NJ or yoga in Piscataway, NJ and yoga in other Central New Jersey areas, get in touch with me at Yoga Destiny.

0 Comments

Yoga Poses for Sciatica

7/14/2012

2 Comments

 
Picture
Many people suffering with sciatica turn to yoga for relief.  When the sciatic nerve is compressed or irritated, mild to severe pain, numbness, or weakness is experienced.  Sciatica can affect the back, hip, and even cause pain to radiate down the outside of the leg.

Try these poses to gently stretch the body and improve posture:

Standing Forward Bend:  From a standing position, bend from the hips and fold forward. Place hands on legs or floor depending on your flexibility. (Level of difficulty: beginner)

Warrior I: : Stand with feet approximately 3 1/2 to 4 feet  apart from each other. Turn the right foot out to a 90 degree angle so that toes face the short end of the mat. Turn left foot in to a 45 degree angle. Square the hips to face the right knee. Raise arms overhead and press palms together. Repeat pose on left side.  (Level of difficulty: beginner) 

Warrior II: Stand with feet approximately 3 1/2 to 4 feet apart from each other. Turn the right foot out to a 90 degree angle so that toes face the short end of the mat. Turn left foot in to a 45 degree angle.  Extend arms out to the sides until hands are at shoulder height. Palms are turned down to the ground. Gaze out over right hand.  Repeat pose on left side.  (Level of difficulty: beginner)

Extended Side Angle: Stand with feet approximately 3 1/2 to 4 feet apart from each other. Turn the right foot out to a 90 degree angle so that toes face the short end of the mat. Turn left foot in to a 45 degree angle.  Lean the right-side of the torso over the right thigh. Bend the right elbow and rest the right forearm lightly on the right thigh. Extend the left arm over head with the palm turned down to the floor. Repeat on left side. (Level of difficulty: beginner)

Triangle: Step feet apart about 3 1/2  feet. Turn the right foot out 90 degrees and the left foot in to a 45 degree angle. Extend the right arm down to the floor. Reach the left arm in to the air, keeping the left-hand directly over the shoulder with palm facing the front. Gaze up to the raised left thumb. Repeat pose on left side.  (Level of difficulty: beginner)

Intense Side Stretch: Step feet apart about 3 feet. Turn the right foot out 90 degrees and the left foot in to a 60 degree angle. Turn hips to face the right foot. Hinge forward from the hips and bring hands to the floor or rest the hands on a block in front of the right foot. Repeat pose on left side.  (Level of difficulty: beginner)

Revolving Triangle: Stand with feet approximately 3 feet apart from each other. Turn the right foot out to a 90 degree angle so that toes face the short end of the mat. Turn left foot to a 60 degree angle. Turn hips forward to face the short end of the mat. Place block on the outside of right foot. Hinge forward from hips and place left hand on the block. Reach right arm into the air with the palm of the right hand facing away from the body. Turn head and gaze up to the raised right thumb. Repeat pose on left side. (Level of difficulty: intermediate)

Half Moon: Step feet about 3 feet away from each other. Turn right foot out to a 90 degree angle and turn left foot in 45 degrees. Bend the right knee. Then, push off the back left foot to straighten the right leg. Keep the left leg lifted in the air. Extend the right arm down to the floor and the left arm into the air. Repeat on left side. (Level of difficulty: intermediate)

Revolving Half Moon: Step feet about 3 feet away from each other. Turn right foot out to a 90 degree angle and turn left foot in 45 degrees. Bend the right knee. Then, push off the back left foot to straighten the right leg. Keep the left leg lifted in the air. Extend the left arm down to the floor and the right arm into the air. Repeat on left side. (Level of difficulty: intermediate)

Warrior III: Stand with feet approximately 3 feet apart from each other. Turn the right foot out to a 90 degree angle so that toes face the short end of the mat. Turn left foot to a 45 degree angle. Turn hips forward to face the short end of the mat. Bend the right knee. Raise arms overhead with hands over shoulders.  Lean torso over the right thigh. Lift the left leg into the air. Take arms out to the side of the body. Repeat on left side. (Level of difficulty: beginner-intermediate)

Standing Extended Big Toe Hold: From a standing position, lift the right leg and hold on to the big right toe with the index and middle finger of the right hand, locking with the thumb. Extend the right leg out in front of you. Repeat pose on left side. (Level of difficulty: intermediate)

Plow: Recline on the mat in a supine position with both arms resting alongside the torso. Palms are turned down to the ground. Lift both legs overhead and roll up on to the shoulders. At this point, bring the hands to the lower back with the elbows on the ground for support. Hinge from the hips and lower the toes to the floor behind the head. (Level of difficulty: intermediate)

Reclining Extended Big Toe Hold: Lie in a supine position on the mat with both legs extended. Pull the right knee into the chest. Wrap a strap under the sole of the right foot and extend the right leg up to the ceiling. Hold on to the strap with both hands and push out through the right heel. Repeat pose on left side. (Level of difficulty: beginner) 

Additional Resources: Stop Sciatic Pain: Information and Yoga Exercises to Heal Sciatic Pain 

Follow us on Facebook and Twitter. For yoga in Dunellen, NJ or yoga in Piscataway, NJ and yoga in other Central New Jersey areas, get in touch with me at Yoga Destiny.


2 Comments

Sunset Yoga in Thailand

5/10/2012

1 Comment

 
Picture
In February, I had the opportunity to attend a wonderful yoga class in Koh Phi Phi, a beautiful island --- just a short ferry ride away from Phuket. It was my first time doing yoga on the beach, and I can’t wait to go again.  The setting was picture-perfect and made for an incredible experience.

Seated on a sundeck on the beach, I gazed out over the Andaman Sea waiting for the class to begin. The class was led by veteran yoga instructor Keira Coleman of Keirita’s Yoga. Keira was both patient and informative as she skillfully guided us through the postures.  

The warm weather helped to loosen my muscles as I transitioned from pose to pose.  It was amazing to move through the sun salutations while watching the sun slowly set over the ocean. 

Ending the class in savasana, I was completely at ease experiencing a moment of serenity as I listened to the sound of the ocean waves in the background.

Keirita’s Yoga offers drop-in classes, 4 class packages and 8 class packages at very affordable rates. For classes and information about yoga in Koh Phi Phi, Thailand, visit www.KeirtitasYoga.com.

Follow me on Facebook and Twitter. For yoga in Dunellen, NJ or yoga in Piscataway, NJ and yoga in other Central New Jersey areas, get in touch with me at Yoga Destiny. 


1 Comment

Revolving Triangle Simplified

11/1/2011

0 Comments

 
Picture
Revolving Triangle (Parivrtta Trikonasana)
Revolving triangle (parivrtta trikonasana) is a challenging pose, but with the use a block almost anyone can practice this posture.  Try out these simple modifications for revolving triangle.

Modification 1: Stand with feet approximately 3 feet apart from each other. Turn the right foot out to a 90 degree angle so that toes face the short end of the mat. Turn left foot to a 45 degree angle. Turn hips forward to face the short end of the mat. Place block on the inside of right foot. Hinge forward from hips and place left hand on the block. Reach right arm into the air with the palm of the right hand facing away from the body. Turn head and gaze up at ceiling.*  Then repeat the pose on left side.

Modification 2: Stand with feet approximately 3 feet apart from each other. Turn the right foot out to a 90 degree angle so that toes face the short end of the mat. Turn left foot to a 45 degree angle. Turn hips forward to face the short end of the mat. Place block on the outside of right foot. Hinge forward from hips and place left hand on the block. Reach right arm into the air with the palm of the right hand facing away from the body. Turn head and gaze up at ceiling.* Don’t forget to repeat the pose on left side.

*If gazing up to the ceiling causes dizziness or loss of balance, keep head and gaze turned down to the floor.

Tip: Block height can be adjusted based on individual range of motion. Refer to the pictures in the below slideshow.

Revolving triangle has many benefits and it’s well worth trying. Practicing the pose can strengthen the legs, stretch the hips and spine, open the chest for improved breathing, and aid with digestion. The pose even promotes better balance.


Follow us on Facebook and Twitter. For yoga in Dunellen, NJ or yoga in Piscataway, NJ and yoga in other Central New Jersey areas, get in touch with me at Yoga Destiny.

0 Comments

Take a Seat for Office Yoga

10/14/2011

2 Comments

 
Picture
Take a break during the day and practice yoga. You’ll notice that you will feel more at ease and focused just by taking a few minutes to practice some simple yoga poses.

Here are a few yoga poses that you can do at your desk:

Chair cat/cow: Sit in a chair and alternately arch and round your back. Repeat this movement up to 10 times.

Upward salute to forward bend: Stand several feet behind your chair back. Raise the arms overhead and reach back as you look toward your thumbs. Then, hinge forward from the hips with a flat back and arms extended. Hold on to the back of a chair with both hands. Repeat 5 times.

Chair twist: Sit with the right side of the body facing the chair back. Twisting from the waist, turn to the right and place both hands on the back of the chair. Use the hands to deepen the twist. Repeat on the opposite side.

Seated lower back stretch: Sit in a chair. Separate legs a little wider than the width of the hips. Bend from the hips and let the torso relax forward and the head drop down.  Hold on to the elbows with each hand and let the arms hang. If this pose causes strain or discomfort, try placing a rolled up blanket or towel on your lap for support.

Seated hamstring stretch: Sit on the front edge of a chair and extend both legs out. Position feet on the wall with a tie wrapped under the soles of the feet. Keep the back straight and hinge forward from the hip crease. Hold for up to 5 breaths.

Crescent pose: Raise arms overhead. Bring the hands together and interlace the fingers with pointer fingers extended. Lifting from underneath the left side of the rib cage, tilt to the right side. Keep arms straight and allow the right hand to pull on the left hand. This pose can be done either standing or seated. Repeat on both sides.

These poses are a great option for re-energizing and decreasing tension held in the body from long periods of sitting, and don’t take long to do.

If you want to be an office hero, organize a weekly yoga class for interested employees at your office. Many yoga instructors will come to your place of business either in the early morning, during lunchtime, or just after work to provide on-site instruction, which makes it quite convenient.  Just clear out a conference room for an hour and get co-workers to meet at a designated time to practice yoga asanas, relaxation, and meditation with a certified yoga instructor.

Talk to your Human Resources department about organizing on-site yoga classes. A lot of large corporations are now making available weekly or even daily yoga classes to their employees as a benefit because employers have seen the positive results of practicing yoga in the workplace. Your employer may be willing to either cover the entire cost of the class as a perquisite or subsidize a portion of the cost. Businesses that offer yoga to their employees have reported better attendance, less use of sick days, and higher worker satisfaction.

If your office is located in central New Jersey, contact us at Yoga Destiny  to set up a regular yoga class at your workplace.


Follow us on Facebook and Twitter. For yoga in Dunellen, NJ or yoga in Piscataway, NJ and yoga in other Central New Jersey areas, get in touch with me at Yoga Destiny.


2 Comments

Guided or Focused Relaxation

9/14/2011

1 Comment

 
A guided or focused relaxation can be a very pleasant experience. After a stressful day, it is a good way to unwind and refocus the mind.  During a guided relaxation, while resting in a supine position, verbal cues are provided to begin relaxing one muscle at a time to achieve full relaxation. By drawing the focus to individual body parts, you are encouraged to visualize releasing the tension held in these areas of the body.

It is important that during the guided relaxation you are in a quiet space where you will not be disturbed by other people or outside sounds. This type of relaxation can be done at anytime as long as you can devote your full attention to the process. One of the optimal times to practice may be when you are feeling stressed or overwhelmed so that you can change the focus of your mind and physically relax the body.

Many yoga classes often end asana (yoga poses) practice with a relaxation in savasana, a reclined position on the mat, giving the body a chance to cool down and enter a state of tranquility. Audio versions of guided relaxations are also another way to experience the serenity that comes by actively releasing tension from the body.

Besides the sense of peace that results from relaxation, according to the Harvard Medical School genes that fight diseases are more active in people who regularly practice guided relaxation.  The benefits of relaxation include lower blood pressure, boosted immunity, calmer nerves, and unlike medications designed to promote relaxation, a guided relaxation produces the desired results without undue side effects.

Mental clarity is another boon of guided relaxation.  Yoga is constructed to quiet the internal mental chatter created by thoughts commonly referred to as “monkey mind” among yogis; another reason yoga classes incorporate guided relaxation in practice sessions prior to meditation. With guided relaxation, the mind is aware, the body is relaxed, and internal chatter of the mind is curbed.

For an introduction to guided relaxation, Yoga Destiny offers an 18 minute audio that you can listen to in the comfort of your home on demand. Try out Yoga Destiny’s Guided Relaxation and get started soothing your mind and body.

Additional resources: Guided Relaxation Audio

Follow us on Facebook and Twitter. For yoga in Dunellen, NJ or yoga in Piscataway, NJ and yoga in other Central New Jersey areas, get in touch with me at Yoga Destiny.

1 Comment
<<Previous
    Picture


    Author
    Denise Hitch
    Certified Hatha Yoga 
      Instructor


    Archives

    January 2016
    March 2015
    August 2014
    June 2014
    July 2012
    May 2012
    November 2011
    October 2011
    September 2011
    July 2011
    June 2011
    August 2010
    July 2010
    June 2010
    May 2010
    April 2010
    March 2010
    February 2010
    January 2010

    Categories

    All

Powered by Create your own unique website with customizable templates.
Photo used under Creative Commons from lululemon athletica